Tuesday, September 27, 2011

Les Paul Build, Part I

A few months ago I decided to build a Gibson Les Paul from scratch. My progress came to a screeching halt around August, but I figured I'd report how things have progressed so far.

The first step in the process was to make a router template. I managed to use my plans to draw the shape of the body on some leftover plywood from my 1x15 cab:


 I then proceeded to cut it out on the band saw. It's important to get this template as close as possible to the final shape you want because it's what is guiding the router. If there's a small bump somewhere in your template, your router is going to put a small bump in your project!

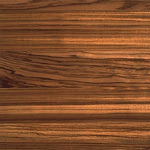
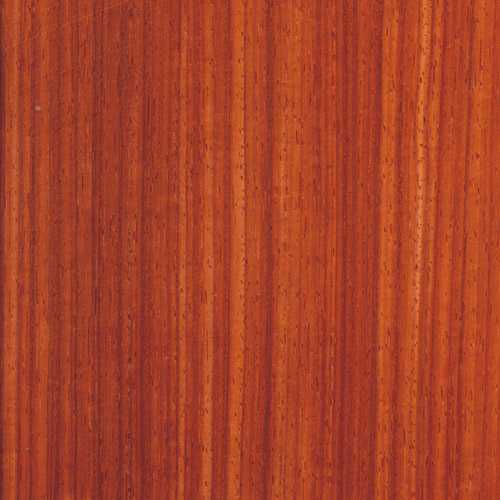
So, I went to my local woodworking shop looking for some exotic wood. I was expecting to pay a good amount- the stuff isn't cheap. As I walk through isle after isle of zebrawood, purple heart, flame walnut... I ran across a HUGE slab of padauk that cost $3.50 a board foot! This was a FANTASTIC deal. To put it in perspective, if you were to go to Lowes or Home Depot or the like, simple pine (the most common wood I can think of) would cost ~$5 a board foot and something like zebrawood would cost ~$20 per board foot. I got away with murder...


 It was discounted because it was so warped, but I couldn't have cared less since I cut it into much smaller pieces. I decided to make the body out of one solid piece of padauk. You'd be hard-pressed to find a guitar that can boast that!

As an aside, padauk is pretty toxic if exposed to it for long periods of time. The oils in the wood cause allergic reactions in a lot of people and this only gets worse as you are exposed to it longer.


So I cut the rough shape of the body out with the band saw, then placed the template on top and went to town with the router. This stuff is VERY hard wood. It actually dulled the router bit to the point that it started tearing out the wood grain in certain parts.


This process created a lot of dust. I look like I belly-flopped into pool of cheetos.


Lookin good...

Sadly, I didn't take pictures of the process of routing channels for the pots, pickups, and pick-up selector before I glued the top on. Those are purple heart stripes (and your eyes aren't playing tricks on you, they are definitely crooked).


I have to stop at this point and begin work on the neck.


The easiest way I know of to prevent the neck from warping to take one large piece of wood (let's just say large enough to carve a neck out of), cut it into multiple pieces length-wise, and flip every other piece before you glue it back together. This way, when the wood inevitably warps, it meets resistance with the pieces who's grains are oriented the opposite way. This keeps the neck somewhat stable and you can rely less on the truss-rod.


To show how I created the angle in the headstock, I took step by step pictures. I am feeling lazy, so I'm not going to go into too much detail about how I did it. If you have questions, shoot me an email. I don't mind answering questions!

Step 1: Cut.

Step 2: Move.

Step 3: Glue.

At this point, I started work on the fretboard. Conveniently enough, there was a luthier's ruler with the frets for a 24 3/4'' scale length fretboard laid out on it. I tried to be as accurate as possible in drawing the lines for the frets and cutting them out.

Step 1: Make marks.

Step 2: Draw lines with a square and sharp pencil.

Step 3: Cut channels with a thin, accurate saw and your square.


It's certainly starting to look like a guitar!

The next step was to get the slot for the neck made. I used a drill press with a forstner bit to get most of the wood out of the way, then went to town with a sharp chisel.


Nobody's perfect...

I find it hard to articulate how tiring it is to use a chisel on padauk, so I won't even try to. It was so hard I decided to take a break from the body and begin shaping my neck. This wasn't too bad. With a spoke shave and some hard work I went from:


this

to this.

All in all, the neck-shaping process took about 2 hours. I stopped every couple of minutes to see how it felt in my hand and accounted for the fact that the fretboard will add ~1/8'' to the thickness.

That's all I've done so far. Hopefully I can get back to work on it once I get a job and make some money to support my creative pursuits.

Orange sawdust on all the things.

Back to Building Soon...

I've been holding off on my creative pursuits because I can't find a job. My thoughts were that I would find work quicker if I didn't spend most of my time in the wood shop. Well it's been a few months, A LOT of job applications, and three phone interviews. No luck.

As soon as I save up enough money, I'm going to continue working on my guitar. I'm actually going to post a progress report on that right after I finish this post.

Wednesday, July 20, 2011

Chessboard for Father's Day

WOW, I underestimated how lazy I could be about posting on this blog. Almost 2 months... anywho.

For father's day a while back, I decided to build my dad a sweet chess board.


Little did I know how much time was going to be involved. I figured it would be as simple as cutting a bunch of different colored squares and gluing them together. Easy right? Wrong! Chessboards are 8x8 and by the time you get halfway through spreading glue on all four sides of 64 squares, the pieces you first glued together will surely have set. I saw this guy's video and decided to do what he did. Needless to say, it worked. I'll talk through how I did it.


We begin our journey of chess board creation by selecting three different kinds of wood, in my case they will be cherry (the light one), walnut (the dark one), and oak (for the borders). I'm sorry if I can't specify what kind of cherry, walnut, or oak. I have no idea what sub-category I used, nor do I think anyone reading this post will care.


Here are the pieces of cherry and walnut I used. I determined how much wood to use by cutting each one to the length of the checkerboard length-wise (probably longer) and about half of the length of the checkerboard width-wise (probably longer again).


I then jointed and planed the wood to make it square and easy to cut and proceeded to cut long strips as shown above. As our bald woodworking friend in the video above showed us, I glued those strips together like so:


After the glue set I scraped off excess glue and planed the board to get it flat again. I then cut the strips cross-grain, flipped every other newly cut strip, and glued them together again.


I am pretty sloppy when it comes to gluing and the board was not perfectly flat on top after being glued together. Right now you're probably saying to yourself "hey Tony! Why don't you just plane the top again to get it flat?" My response to that is that I can't! The grain is no longer going in the same direction. In math terms, you've got grain in some squares going along the x-axis and some squares with grain going along the y-axis. The planer requires all of the grain to be in the same direction. I'm sure you could send it through anyway, but it would tear out wood and ruin not only the planer but the chessboard as well! My solution? Use an orbital sander.

I'm sure you're also saying "WAIT A MINUTE... What is that piece of wood underneath the checkerboard for?!" Well, it's plywood and I glued it underneath the checkerboard for two reasons:

1) The pretty cherry/walnut checkerboard is not very thick after being jointed/planed, planed again, and then sanded. The actual checkerboard is ~1/4'' thick. Put simply, it needs reinforcement from plywood which is pretty hard to break.

2) The pretty cherry/walnut checkerboard is so thin that it's beginning to warp! Over time this will only get worse and we can't have that. Gluing it to the plywood will get it to sit flat and stay flat. Plywood doesn't warp nearly as easily as hardwood.

Sand again for good measure.

After squaring up the edges of the plywood with a router, I had it sitting right against the checkerboard. Nothing left to do but put the border on!


I used oak on the border simply because I already had it laying around and it's a nice looking wood. A radial-arm saw was used to cut the pieces at 45 degrees and they were glued on. 


I used a router with an OG bit to put the fancy looking edges on the border, making sure to leave ~1/8'' at the bottom. Going too close to the bottom allows the border to break easily if accidently bumped against something.

After sanding there was nothing left to do except apply finish! I used danish oil.


This project took about two weeks since I had to let the board sit overnight every time I glued it.


-Tony

P.S. I still haven't found the charger for my camera, so all of these pictures were taken with my phone again. Sorry!

Monday, May 16, 2011

First 1x15 Speaker Cab Build

So I decided to build a speaker cabinet since I bought a 15'' Jensen MOD almost a year ago. I never really put it to much use but I figured if I built a decent cabinet for it I could begin to use it more. I don't know the exact dimensions off the top of my head but it is exactly as wide as my Marshall 1960B (so it's stackable) and just tall enough to comfortably fit the speaker and I used regular 1'' birch plywood (not baltic birch). The guys at Emperor Cabs use birch hardwood which is MUCH nicer and they don't have to cover it in tolex. Me? I used the cheapest possible wood so it won't sound that great, but I did learn a lot from it.

Here are some pictures of the cab halfway through construction:


I hadn't cut out the baffle yet at that point but it came together very nicely.  Before I built the cab, I had no idea how awful birch plywood looks after being sanded. I was thinking it would turn out like some kind of custom cabinet from the heavens, but it ended up looking like this:

 
 I spray painted it because I was too cheap to buy tolex. Overall, I'd say it was a success. Maybe in the future I'll post some pictures of the completely finished product or maybe even video of me shredding on it!

-Tony

Blasting Off!

Hello there! This is the first (of hopefully many) posts I'll be making on this blog. It's going to be a place for me to talk about whatever it is that I happen to be working on. As of right now, I'm an undergraduate at North Carolina State University studying physics and trying to go to grad school for computer science.

I've got a couple of posts that I will blast out back to back because I planned on making this blog for a while. Instead of wasting time on introductions, I'm just going to jump right in. Be wary of the crappy pictures! I lost the charger for my digital camera, but I'll find it sometime soon. Don't you worry.


Rock on.


-Tony